Lash Adhesive Drying Time For Beginners
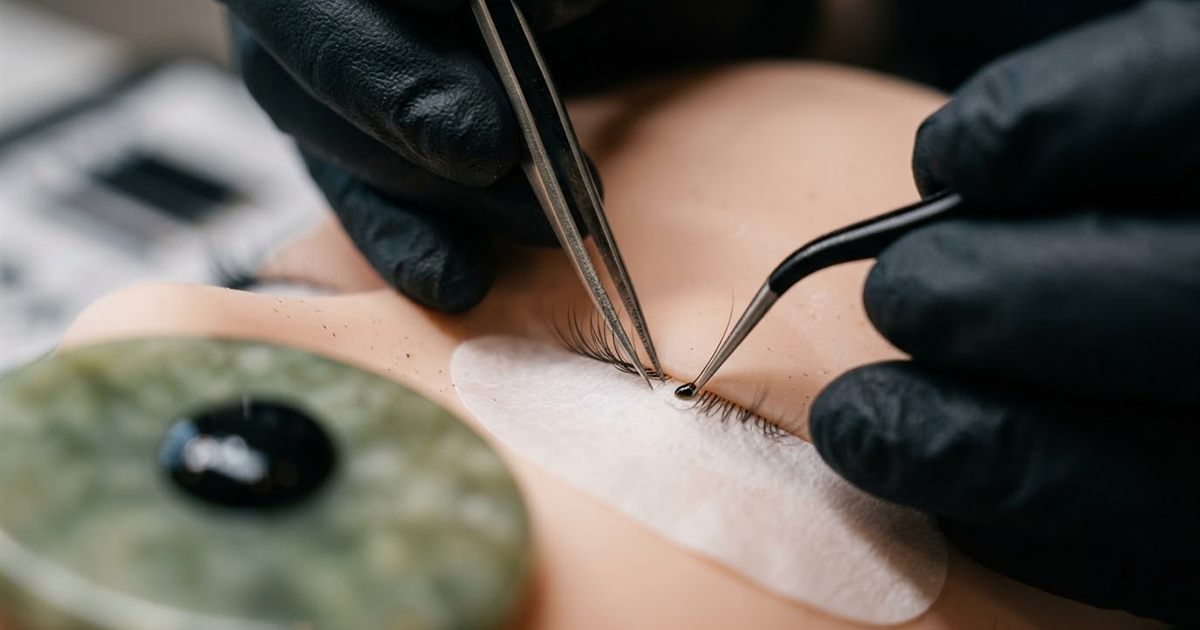
Ask a room of lash artists what frustrates them most and many will say the same thing: adhesive. It dries too fast, or too slowly, or behaves one way on Monday and another way on Friday. For a beginner, adhesive feels like a mysterious variable that ruins perfectly good isolation. The truth is that drying time is not magic, it is a set of predictable factors you can learn to read and control. This guide explains what drying time actually means, how it differs from curing, how adhesive speeds compare and how a beginner can choose and test an adhesive with confidence.
Free Guide
Get Your Free Lash Extensions Starter Guide
A $17 value, yours free today. We'll send the guide straight to your inbox in the next minute.
You'll also get occasional lash tips by email. Unsubscribe anytime.
Drying Time Versus Curing Time
These two words are often used as if they mean the same thing, but they describe different moments.
- Drying time, or set time: how long it takes for the adhesive to grab the lash and hold it in place after you touch the extension to the natural lash. For lash adhesives this is typically a matter of seconds.
- Curing time: the longer process, lasting many hours, in which the bond reaches its full strength. This is why clients are told to avoid water and steam for a period after their appointment, as your adhesive’s manufacturer recommends.
As a beginner, the number you will feel in your fingers is the drying time. It decides how many seconds you have to place, adjust and hold an extension before it sticks where it is. The curing time matters more for aftercare and retention, which you can explore in how to fix poor lash retention.
Why Drying Time Matters So Much To A Beginner
Imagine you have just isolated a lash. You dip the extension, bring it to the natural lash and need a moment to align it. If the adhesive grabs instantly, you have almost no time to correct the angle. If it takes far too long, you risk the extension drifting or touching neighboring lashes. Both situations create the same problems: stickies, crooked placement and weak bonds.
Too much time can be just as troublesome as too little, which is why choosing an adhesive that matches your current skill makes a big difference. Lash stickies and clumping for beginners shows how adhesive speed and isolation work together.
Fast Adhesives Versus Slower Adhesives
Lash adhesives are usually sold by drying speed, often expressed as a range of seconds. The exact numbers vary by brand and by conditions, so treat the following as a general guide, not a promise.
Fast Drying Adhesives
These grab almost immediately, often in one to two seconds. They are popular with experienced artists who place extensions quickly and cleanly, especially for volume sets. They reward speed and precision, and they punish hesitation.
Slower Drying Adhesives
These give you a few more seconds to position each extension. Many trainers suggest them for beginners because they allow small corrections while you build your isolation and placement skills. The trade off is that a slower adhesive can be more affected by movement and by environmental conditions.
A Sensible Path
Start with something that feels manageable, practice until your isolation is steady, and then try a faster adhesive when you want to improve speed. There is no shame in staying with a slightly slower adhesive if it gives you consistently clean results. Does the adhesive brand matter in a lash course? and lash products every beginner should know explain how to choose and compare products.
What Changes How Adhesive Dries
The label on the bottle is only part of the story. The same adhesive can behave differently depending on the setting.
- Humidity: this is the biggest factor for most artists. Higher humidity usually speeds up the reaction, and very dry air can slow it down. Many brands publish a recommended range, so read the instructions for your own bottle.
- Temperature: a very warm or cold room changes how quickly the adhesive reacts and how it flows.
- Airflow: fans, air conditioning and open windows all move air across the adhesive drop and the lash line.
- How long the drop has been out: adhesive on a jade stone or palette starts to change as soon as it is exposed. Many artists replace the drop regularly during a session, following their manufacturer’s guidance.
- Bottle freshness and storage: old or poorly stored adhesive behaves differently. Lash adhesive storage and shelf life explains how to keep it in good shape.
Environment is such a big part of this that it deserves its own guide: how humidity and climate affect lash retention goes deeper into measuring and adjusting your space.
How To Test Your Adhesive Before A Client
Never discover your adhesive’s behavior for the first time on a client. Test it on a practice setup instead.
- Set your environment the way it will be in the appointment: same room, same airflow, same temperature.
- Use a mannequin head or lash strip: practice on something that cannot be harmed. A lash course mannequin head practice guide shows how to set it up.
- Place a few extensions and count: note roughly how long it takes for each to hold, using a simple timer or your own count.
- Try a gentle tug: a properly placed extension should feel secure without stretching or misaligning.
- Repeat later in the session: check again after the drop has been out for a while to see how the behavior changes.
- Write it down: record the room conditions and what you observed, so you can compare from day to day. A practice log works well for this, as described in lash course homework and practice tasks.
Troubleshooting Common Drying Problems
Extensions Are Grabbing Too Fast
You may feel rushed, or find that lashes stick before you can align them. Check humidity and airflow first, make sure your drop is fresh and consider whether the adhesive is too fast for your current speed.
Extensions Are Taking Too Long To Hold
Lashes may slide or touch neighbors. Check whether the room is very dry or cool, whether the adhesive is old and whether you are using too much on each extension. Remember that too much adhesive is a very common beginner habit.
Results Change From Day To Day
This is almost always the environment. Measure humidity and temperature, and keep notes. Small measured differences explain a lot of mystery.
Clients Report Irritation Or Strong Fumes
Adhesive fumes can bother clients and artists. Ventilate the room properly and follow product guidelines. Adhesive fumes and health in lash extension training covers this in detail, and lash adhesive sensitivity and patch testing explains how to check for reactions.
Common Beginner Mistakes With Adhesive
- Using too much adhesive: more is not stronger, it is messier.
- Not replacing the drop: an old drop behaves differently from a fresh one.
- Changing brands constantly: switching every week makes it impossible to learn how any one behaves.
- Ignoring the room: the same adhesive acts differently in a humid bathroom and a dry studio.
- Rushing to a fast adhesive: speed comes from technique, not only from the bottle.
- Skipping the instructions: the manufacturer’s range for humidity, temperature and storage is there for a reason.
A Simple Adhesive Routine
- Check the room temperature and humidity before you start.
- Shake or prepare the adhesive as your manufacturer instructs.
- Place a fresh drop and replace it as recommended.
- Use only a small amount on each extension.
- Keep notes on how the adhesive behaved during the session.
- Store the bottle properly after the appointment.
What Our Course Includes
The Lash Extensions Master Course teaches adhesives as part of the foundation, not an afterthought. Module 1 includes Product Knowledge, Module 2 includes an Adhesives lesson alongside Retention, and Module 3 walks through application. The course is a one time $97 payment with lifetime access to 31 video lessons across six modules, plus a 90 plus page training manual, a Certificate of Completion and a 7 day money back guarantee. You can pause and rewatch any lesson on any device while you test your own adhesive.
Final Thoughts
Adhesive drying time is not a mystery once you separate drying from curing, understand fast and slow speeds and pay attention to the room. Start with an adhesive that matches your skill, test it on a mannequin, keep notes and change one thing at a time. With that approach, adhesive stops being the thing that ruins your sets and becomes a tool you control.
Free Guide
Get Your Free Lash Extensions Starter Guide
A $17 value, yours free today. We'll send the guide straight to your inbox in the next minute.
You'll also get occasional lash tips by email. Unsubscribe anytime.
Frequently Asked Questions
Drying time, often called set time, is how long the adhesive takes to grab and hold a lash in place, usually a few seconds. Curing is the longer chemical process that continues for many hours afterward, which is why clients are usually told to protect new lashes from water for a period. Always follow your adhesive manufacturer's instructions.
Keep Reading
Popular Lash Training Guides
- Minimum Age For Eyelash Extension Training
- Eyelash Extension Training Cost In 2026: Real Breakdown
- Lash Tech License Requirements By State
- Is It Hard To Learn Eyelash Extensions? Honest Answer
Ready to go from reading to doing? See the full Lash Extensions Master Course or browse all lash training guides.