Lash Adhesive Storage And Shelf Life Guide
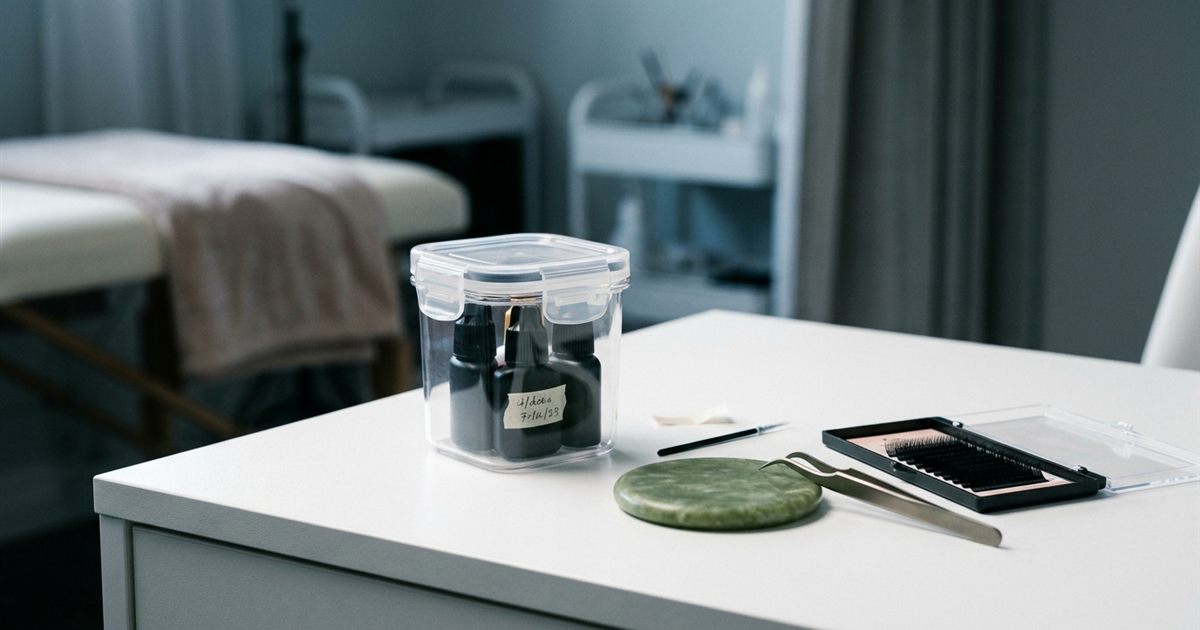
It is easy to spend weeks perfecting your isolation and fan making and never think about the little bottle that holds everything together. Lash adhesive is the one supply in your kit that changes over time. It reacts to air, heat and moisture, and it is the reason a set either stays put for weeks or lets go in a few days. Many beginners blame their technique when retention drops, when the real culprit is adhesive that was stored badly or kept too long. If you plan to take an eyelash extension course, learning how to store and manage your adhesive will save you money, protect your clients and make your sets last.
Free Guide
Get Your Free Lash Extensions Starter Guide
A $17 value, yours free today. We'll send the guide straight to your inbox in the next minute.
You'll also get occasional lash tips by email. Unsubscribe anytime.
Even the best technique cannot make up for adhesive that has degraded. Storing it properly and replacing it on time is one of the cheapest ways to improve retention.
Why Adhesive Behaves Differently Over Time
Lash adhesive is designed to cure quickly when it touches moisture in the air, which is what lets an extension bond to a natural lash in a second or two. That same property makes it sensitive. Every time you open the bottle, you expose it to air and humidity. Over time the adhesive can thicken, cure more slowly or lose strength.
Heat and light also matter. A bottle left in a warm car, on a sunny windowsill or near a heater can change faster than one kept in a stable place. This is why storage is a real skill, not a minor detail. The climate where you work plays a part too, and humidity, climate and lash retention explains how the room itself affects curing.
Always Start With The Manufacturer’s Instructions
Different brands are formulated differently, so there is no universal rule. Your adhesive maker knows how long the product remains reliable, how it should be stored and how it should be handled. Before you make any decision about storage or replacement, read the label and any instructions that come with the bottle.
In your own training, follow what your course teaches about the products you use. When in doubt, the manufacturer’s guidance comes first, and the general tips below are common practice rather than a replacement for it.
How To Store Lash Adhesive
Good storage is simple once you know the principles.
- Keep it upright. This helps prevent leaking and keeps the nozzle from clogging.
- Close the cap tightly every time, right away, so less air gets in.
- Store it in a cool, dry place. Avoid direct sunlight, heaters, hot cars and damp bathrooms.
- Use an airtight container if your manufacturer recommends it. Some artists add a moisture absorbing packet, but follow your brand’s guidance.
- Keep it away from strong odors and chemicals, and out of reach of children and pets.
- Do not move it between very different temperatures if you can avoid it, because condensation can form.
A question many beginners ask is whether adhesive belongs in the refrigerator. Some brands allow it for unopened bottles, while others warn against it because of condensation. Do not guess, and check the instructions first.
Date Every Bottle
One of the easiest habits to build is writing the opening date on the bottle. Without a date, it is very easy to lose track of how long you have been using the same adhesive, and old adhesive is a hidden cause of poor retention.
- Write the date on the bottle or a small label the day you open it.
- Note the batch or expiration information if the packaging shows it.
- Replace the bottle on your manufacturer’s schedule, or sooner if it shows signs of change.
- Do not top up an old bottle with new adhesive. Mixing them defeats the purpose of tracking.
Many manufacturers suggest replacing an opened bottle after a period measured in weeks rather than months. The exact timing varies, so treat this as a reason to check your own brand rather than as a fixed number.
Signs That Your Adhesive Has Gone Bad
Adhesive rarely fails all at once. It usually gives you signals. Watch for:
- A thick, stringy or gummy texture that no longer forms a clean drop.
- Slow curing, where extensions take longer to set than they used to.
- A weak bond, with extensions that lift or fall off soon after application.
- A changed smell, or a stronger fume than usual.
- A clogged or crusty nozzle that is hard to clear.
- Cloudy or unusual color, if your product is normally clear or black.
Any of these is a reason to test with a fresh bottle. If retention improves right away, you have found the cause. If it does not, look elsewhere, and how to fix poor lash retention walks through the other common culprits.
Handling Adhesive During The Appointment
Storage is only half of the story. How you use adhesive during a set affects it too.
- Use a fresh drop at the start of each appointment, and refresh it regularly during a long set, as your training recommends.
- Keep the drop on a clean, dry surface such as a glue plate or jade stone.
- Wipe the nozzle clean with a lint free wipe after every use, so dried adhesive does not build up.
- Never let the nozzle touch skin, tools or lashes. This spreads contamination and can ruin the whole bottle.
- Work in good ventilation. Fumes irritate some clients and can bother you, as covered in adhesive fumes and your health in lash training.
Hygiene is part of adhesive care, and the basics are in sanitation and hygiene in lash training.
Safety Matters As Much As Retention
Old, contaminated or badly stored adhesive is not only a quality problem. Changes in the product can change how it interacts with the client’s eyes and skin. A client who has never reacted before could react to a bottle that has degraded, and a new batch can behave differently from the last.
- Pay attention to any change in how clients respond after you change bottles.
- Stop using a product immediately if clients report new irritation.
- Keep records of which bottle you used on which client, so you can trace problems.
Read what to do if a client reacts to lash adhesive and lash adhesive sensitivity and patch tests to understand how to respond.
Buy Wisely, And Do Not Stockpile
The temptation to buy many bottles at a discount is understandable, especially when you are watching your budget. But adhesive is a poor product to stockpile, because it loses quality with time even when unopened, depending on the brand and conditions.
- Buy from reputable suppliers so you know the product is genuine and has been stored properly.
- Purchase amounts you will use within the recommended window.
- Check dates on arrival and reject anything that looks old or damaged.
- Factor adhesive into your monthly costs. See monthly supply costs after a lash course for a realistic picture.
Your choice of brand also influences how you store and use it, which is why does your course’s adhesive brand matter is worth reading before you buy.
Special Cases: Traveling And Mobile Artists
If you work on the go, your adhesive faces more stress from heat, cold and bumps. Cars can become very hot, and leaving a bottle inside one is one of the fastest ways to spoil it.
- Carry your adhesive with you instead of leaving it in the vehicle.
- Use an insulated, closed case to protect it from big temperature changes.
- Allow it to reach room temperature before use if it has been somewhere cold.
- Check it before every appointment for changes in texture or behavior.
The mobile business model has its own logistics, explained in mobile lash tech or rent a suite.
Common Adhesive Storage Mistakes
- Leaving the cap loose, even for a few minutes.
- Storing the bottle in a hot car or on a sunny shelf.
- Not dating the bottle, then guessing how old it is.
- Using one bottle for months because it still looks fine.
- Ignoring a dirty nozzle, which introduces contamination and blocks flow.
- Blaming technique for weak retention without checking the adhesive first.
How A Course Helps You Handle Adhesive Correctly
Reading about adhesive is useful, but seeing how a professional handles it makes the difference. A good eyelash extension course shows you how to set up your adhesive, how to read how it is behaving and how it affects retention, so you avoid the expensive trial and error that many self taught artists go through.
What Our Course Includes
The Lash Extensions Master Course includes dedicated lessons on product knowledge, retention and adhesives inside its 31 high quality video lessons, along with lash cart setup, full set application, refills and health and safety. You also get a 90+ page Classic, Hybrid and Volume Lash Training Manual with a homework template and notes section, lifetime access and a Certificate of Completion, so you can return to the adhesive lessons whenever your retention needs a check.
Final Thoughts
Adhesive is the smallest item in your lash kit and one of the most important. Store it properly, date every bottle, watch for signs of change and replace it on time. Do that, and a large share of retention problems will never happen. If you are still deciding how to learn, begin with how to choose a lash extensions course, and make sure the one you pick teaches products and adhesives in real detail.
Free Guide
Get Your Free Lash Extensions Starter Guide
A $17 value, yours free today. We'll send the guide straight to your inbox in the next minute.
You'll also get occasional lash tips by email. Unsubscribe anytime.
Frequently Asked Questions
It depends on the brand, but many manufacturers recommend replacing an opened bottle after a few weeks. Always follow the instructions from your adhesive maker and write the opening date on the bottle.
Keep Reading
Popular Lash Training Guides
- Minimum Age For Eyelash Extension Training
- Eyelash Extension Training Cost In 2026: Real Breakdown
- Lash Tech License Requirements By State
- Is It Hard To Learn Eyelash Extensions? Honest Answer
Ready to go from reading to doing? See the full Lash Extensions Master Course or browse all lash training guides.