Lash Prep Before Extensions: Step By Step
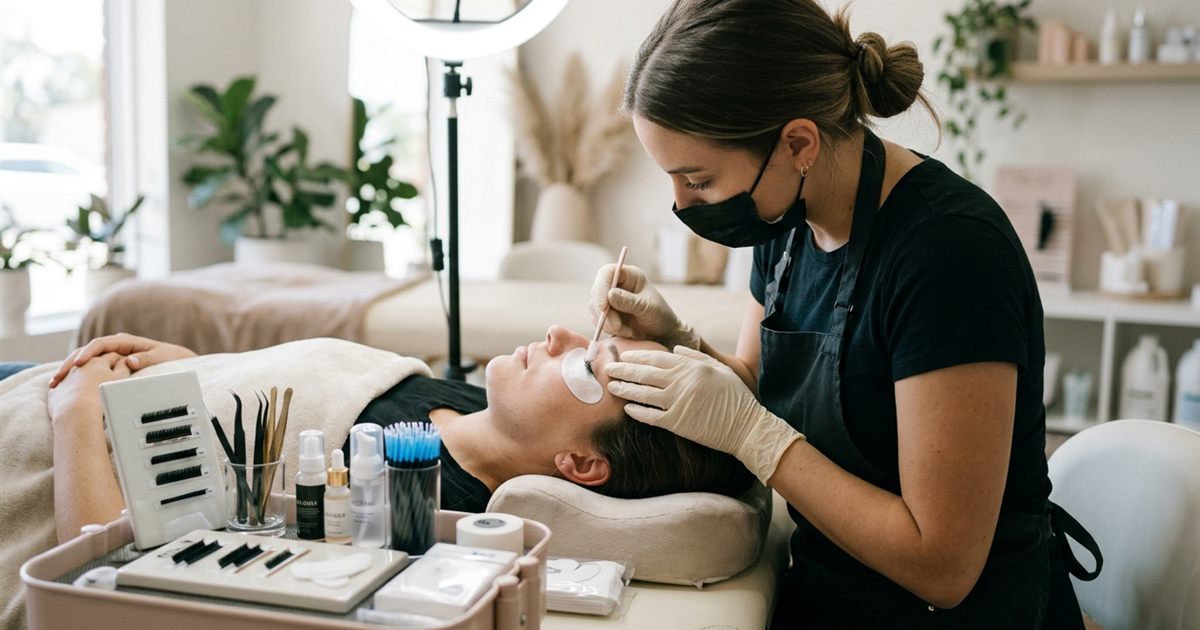
When people picture lash extensions, they picture the moment of placement: tweezers, isolated lashes and a glossy fan set down on a natural lash. What they rarely see is what happens in the ten minutes before that. The cleansing, the drying, the pads and the workstation setup decide whether the set will hold for weeks or start falling out in days. Beginners often rush through preparation because it feels like waiting to start the real work, but in reality it is part of the real work. If you are considering an eyelash extension course, this guide shows what proper lash prep looks like, why each step matters and how to build a routine you can repeat with every client.
Free Guide
Get Your Free Lash Extensions Starter Guide
A $17 value, yours free today. We'll send the guide straight to your inbox in the next minute.
You'll also get occasional lash tips by email. Unsubscribe anytime.
Extensions can only bond as well as the surface they are applied to. Preparation is not a preliminary. It is the foundation of retention, comfort and safety.
Why Prep Comes First
Adhesive needs a clean, dry, oil free surface to grip. Natural lashes naturally collect makeup residue, skin oils, dust, sunscreen and skincare products. Any of those can create a thin film that weakens the bond, and you will not see it until the set starts lifting.
Prep also protects the client. It gives you a moment to look at the eyes for irritation, confirm that nothing has changed since her last visit and make her comfortable before you begin work near a sensitive area. If you have ever wondered why some sets fall out quickly, the answer is often here, which is why how to fix poor lash retention starts by checking preparation.
Step 1: A Quick Check Before You Touch Anything
Before cleansing, spend a minute confirming that it is safe to proceed.
- Ask how the eyes feel today. Redness, swelling, irritation or infection are reasons to stop and reschedule.
- Confirm nothing has changed. New medications, recent eye treatments or a reaction to the last set matter.
- Review the plan. Remind the client of the look you agreed on so there are no surprises later.
If it is a first visit, the consultation and any patch test come first. The full process is explained in the lash client consultation step by step and lash adhesive sensitivity and patch tests.
Step 2: Make The Client Comfortable
Comfort is a technical step, not just a nice gesture. A client who is relaxed keeps her eyes closed and her head still, which makes your work easier and safer.
- Adjust the bed and pillow so her neck is supported and her chin is slightly lifted.
- Ask about contact lenses and have her remove them if that is your studio’s rule.
- Explain what will happen and tell her to speak up if anything feels uncomfortable.
- Check the temperature and noise in the room so she can rest.
Good posture for you matters too, and ergonomics in eyelash extension training covers how to set up your own position so long sessions do not hurt.
Step 3: Cleanse The Lashes
This is the step that most affects bonding. The goal is to remove makeup, oils and residue from the natural lashes and the lash line.
- Use a cleanser made for lash work. Oil based products can leave a film, so choose one designed for this purpose, and follow your training and manufacturer guidance.
- Cleanse gently. Work along the lashes and lash line without rubbing the eye or pulling on the lashes.
- Rinse or wipe as directed by the product you are using.
- Do not skip this step, even if the client says she has no makeup on. Oils and skincare products are invisible.
Because you are working close to the eyes, hygiene matters throughout, and the rules are described in sanitation and hygiene in lash training.
Step 4: Dry Thoroughly
Any moisture left on the lashes will interfere with the adhesive. Lashes need to be completely dry before you begin, and the drying method you use should be gentle and safe around the eyes. Take your time here. A few extra seconds is far cheaper than a set that fails. Room conditions such as humidity also affect how adhesive cures, which is covered in humidity, climate and lash retention.
Step 5: Consider A Primer Or Pretreatment
Some lash artists apply a primer or pretreatment after cleansing to help the adhesive grip. Others rely on careful cleansing alone. There is no single right answer, and this is a good example of why you should follow the standards taught in your own course and the instructions of your adhesive maker.
If you use one, keep these points in mind:
- Check compatibility with your adhesive and follow the recommended waiting time.
- Watch the client for reactions, and stop using any product that irritates her.
- Do not let product touch the skin more than necessary.
- Use a fresh applicator to avoid cross contamination.
Step 6: Separate And Protect With Eye Pads
Under eye pads, or gel pads, sit beneath the lower lash line and serve two purposes. They protect the delicate skin under the eye from tools and adhesive, and they hold the lower lashes out of the way. Some artists also use a small piece of medical tape to lift the upper eyelid gently or to secure stray lashes.
- Place pads close to the lash line without touching the natural lashes.
- Check that they are smooth and flat so they do not sit crooked and shift.
- Keep the eye closed and make sure the pad does not irritate the skin.
- Comb the lashes so they are separated and easy to isolate.
Clean isolation depends on this setup, and you can learn the technique itself in lash isolation: the skill beginners need.
Step 7: Set Up Your Workstation
While the client is prepared, your tools must be ready. Trying to find something mid set makes the client wait with her eyes closed and interrupts your rhythm.
- Lay out clean, sanitized tweezers for isolation and for placement.
- Prepare your lashes and trays in the sizes and curls you planned.
- Use fresh adhesive and place a small amount where you can reach it easily.
- Make sure lighting and magnification let you see each lash clearly.
Knowing what to have at hand is part of the setup, and what a lash course supplies kit includes lists the essentials. Your choice of tweezers also matters, as explained in choosing lash tweezers during your course.
What Clients Can Do Before They Arrive
Prep starts before the appointment, and clients can make your work easier. Ask them to:
- Arrive with clean lashes and no eye makeup, especially mascara.
- Avoid oily products near the eyes on the day of the appointment.
- Skip curling the lashes or using lash serums right before the visit unless you have approved them.
- Remove contact lenses if your studio requires it.
- Arrive a few minutes early so the appointment is not rushed.
Sending a short reminder message with these points saves a lot of prep time and improves retention.
Common Prep Mistakes Beginners Make
- Rushing cleansing because the client looks clean. Oils and residue are invisible.
- Applying adhesive before the lashes are fully dry. Moisture weakens the bond.
- Using products without checking compatibility. Mixing brands can cause problems.
- Placing pads too far from the lash line. Lower lashes end up in the way.
- Preparing the client but not the workstation. Searching for tools mid set breaks focus.
- Skipping the eye check. Working over irritation makes things worse.
Many of these show up on lists like top beginner mistakes in eyelash extension training, and preparation is where most of them can be prevented.
How Prep Fits Into The Total Time Of A Set
Beginners often worry about how long a full set takes and try to save time by hurrying through prep. That usually backfires. Solid preparation reduces problems during placement and reduces the corrections you make afterward. As your routine becomes automatic, it takes less time without losing quality. For a realistic view of timing, read how long a beginner full set should take.
What Our Course Includes
The Lash Extensions Master Course covers the process from start to finish in 31 high quality video lessons, including product knowledge, consultation, lash cart setup, full set application, refills, removals, health and safety, and professionalism. You also get a 90+ page Classic, Hybrid and Volume Lash Training Manual, a homework template, lifetime access and a Certificate of Completion, so you can review each step as often as you need while you practice.
Final Thoughts
Great lash sets are built long before the first extension is placed. A careful check, a comfortable client, clean and dry lashes, well placed pads and a ready workstation give you the best possible chance of a set that lasts and stays safe. Turn these steps into a routine you follow every single time, and your retention, your speed and your clients’ comfort will all improve. If you are still choosing where to learn, start with how to choose a lash extensions course.
Free Guide
Get Your Free Lash Extensions Starter Guide
A $17 value, yours free today. We'll send the guide straight to your inbox in the next minute.
You'll also get occasional lash tips by email. Unsubscribe anytime.
Frequently Asked Questions
Clean, dry, oil free lashes let adhesive bond properly, which improves retention and comfort. Skipping prep is one of the most common reasons sets fall out early.
Keep Reading
Popular Lash Training Guides
- Minimum Age For Eyelash Extension Training
- Eyelash Extension Training Cost In 2026: Real Breakdown
- Lash Tech License Requirements By State
- Is It Hard To Learn Eyelash Extensions? Honest Answer
Ready to go from reading to doing? See the full Lash Extensions Master Course or browse all lash training guides.