Choosing Lash Tweezers During Your Course
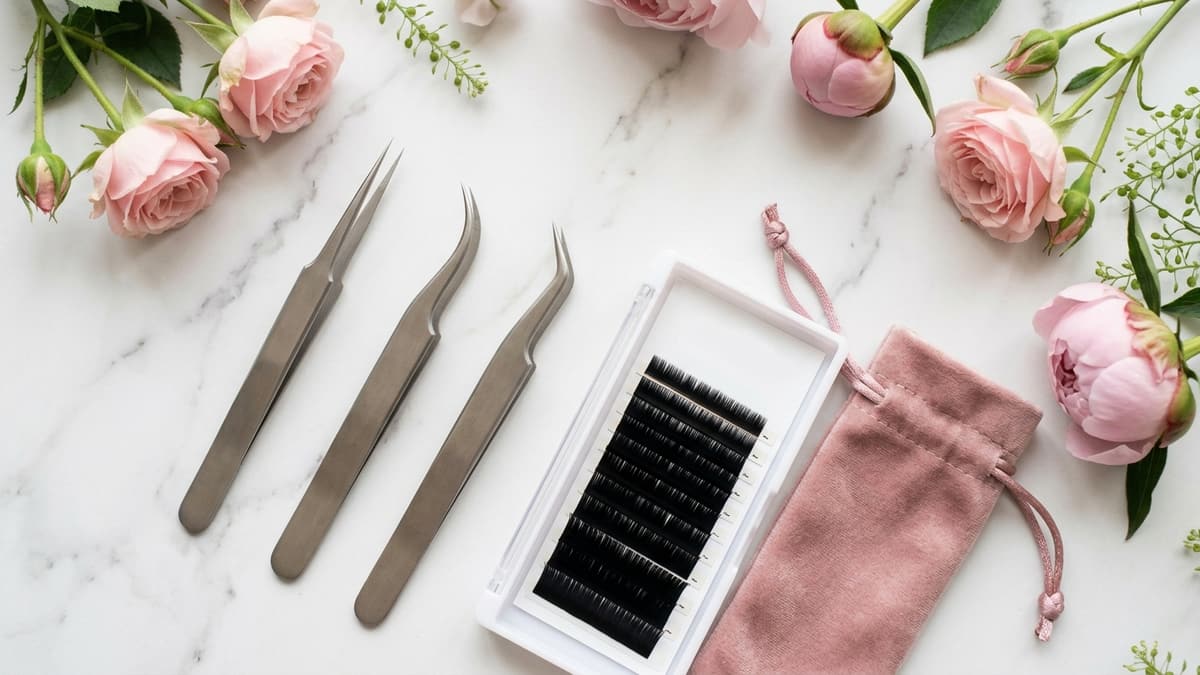
Ask ten lash artists what their favorite tweezers are and you’ll get ten different answers, and often a strong opinion attached to each. That can make choosing your first pair feel harder than it should be. The truth is that tweezers are the single most personal tool in your kit, and for a beginner in an eyelash extension course, the goal is not to find the perfect pair, it’s to understand what each type does so that you can buy two good pairs, learn on them, and refine your choices with real experience.
Free Guide
Get Your Free Lash Extensions Starter Guide
A $17 value, yours free today. We'll send the guide straight to your inbox in the next minute.
You'll also get occasional lash tips by email. Unsubscribe anytime.
Why Tweezers Matter More Than Almost Any Other Tool
Your tweezers are an extension of your fingertips. If they fight your hand, everything from isolation to placement gets harder.
Lash work depends on control at a tiny scale. Your tweezers do two jobs at the same time: one pair isolates a single natural lash, while the other picks up and positions the extension. If the tips don’t meet cleanly, if the spring is too stiff, or if the weight tires your hand, you’ll feel it immediately in the quality and speed of your work. Understanding what to look for saves you money and frustration.
The Two Main Types You Need To Know
Isolation tweezers separate one natural lash from the others so you can work on it without sticking anything together. They usually have very fine, straight or slightly angled tips that meet precisely. A good pair grips a single lash without pulling and lets you sweep neighboring lashes aside cleanly. Isolation is the core skill of the whole profession, so a reliable isolating pair is arguably the most important tool you’ll own.
Pick-up tweezers hold the extension and place it on the isolated natural lash. They come in a few common shapes, including curved, angled, and “boot” or L-shaped styles. The differences are mostly about the angle your hand needs to work at and how the extension is held. Neither shape is right or wrong. It’s about which one feels natural for your technique.
You’ll also see volume tweezers, designed to help create handmade fans, with a slightly wider or differently shaped tip. You don’t need these to start learning classic work, and you can add a pair once you reach that stage of your training.
What To Look For When Choosing
Tip alignment. When you close the tweezers, the tips should meet perfectly with no gap and no crossing. Even a tiny misalignment makes it hard to hold something as fine as a single lash.
Tip shape and size. Finer tips grab less material and allow more precision, but can feel delicate. Slightly broader tips can feel more forgiving for beginners. Try both if you can.
Spring tension. The tweezers should open and close with gentle, even pressure. If you have to squeeze hard, your hand will tire and shake sooner, which is the opposite of what you want. If you’re already worried about hand fatigue, read shaky hands? lash extension training tips.
Weight and grip. Lighter tweezers are usually easier on the hand over a long appointment, and a comfortable grip surface helps you keep your hold relaxed.
Material and finish. Look for durable stainless steel that can be cleaned and disinfected regularly, since hygiene is part of the job. Tools should not rust, chip, or trap residue. See sanitation and hygiene standards in lash training.
Handedness. Most designs suit both hands, but if you’re left-handed, is lash training different for lefties? covers what to consider.
Don’t Overspend Before You Know Your Preferences
It’s tempting to buy a full, expensive set of tweezers in every shape because they look professional, and social media makes them look essential. But your preferences will change as you learn. Many beginners end up preferring a different angle or tip after a month of practice than the one they picked on day one.
A better plan is to buy two solid, mid-range pairs, one for isolation and one for pick-up. Use them exclusively for a few weeks of practice. Pay attention to what frustrates you: is the tip too thin? Is your wrist twisting? Does your hand cramp? Those details tell you exactly what to change if you decide to buy something else. This approach also fits a budget, as covered in lash course supplies: the exact kit you need and monthly supply costs after a lash course.
Test Them The Right Way
When your tweezers arrive, don’t wait until you have a live model to try them. Check the alignment under good light, close them slowly and look at how the tips meet. Practice picking up and releasing a few extensions from a tray. On a mannequin head, practice isolating single lashes over and over, watching for any that come along for the ride. If the tweezers are hard to control or tire your hand in ten minutes, that’s important information.
Care For Your Tweezers
Tweezers are precision tools, and dropping them or using them for anything else can knock the tips out of alignment. Keep a dedicated pair for lash work only, and never use them to open bottles or pry anything. Clean and disinfect them as your training instructs after every client, let them dry fully, and store them in a case or holder so the tips are protected. Misaligned tips can’t always be repaired, so prevention is cheaper than replacement.
Common Beginner Mistakes With Tweezers
Buying too many pairs at once is the first, and usually the most expensive. Choosing a pair just because it’s popular, without checking whether it feels good in your hand, is the second. Gripping too hard is the third, since a tight grip creates fatigue and tremor. And using the same tweezers for both isolation and pick-up leads to sloppy work and cross-contamination of adhesive residue. Each tool has a job. Let it do that job.
How Your Course Fits In
A good course teaches you the technique first, so you understand exactly what you’re looking for before spending money on equipment. That way you’re not guessing based on marketing. If you want to see how tools fit into the bigger picture, what’s included in eyelash extensions training is a good next read, and how to practice lash extensions between course lessons shows how to build skill with the tools you already own.
What Our Course Includes
The Lash Extensions Master Course teaches the techniques first, with 31 video lessons covering product knowledge, lash application, classic mannequin head practice, volume sets, refills, and cart setup, so you know what to look for before you buy anything. You are never required to purchase extra tools to follow along, and a one-time payment gives you lifetime access to rewatch any lesson as your preferences and skills develop.
Final Thoughts
You don’t need the most expensive or the most famous tweezers to learn lash extensions. You need a pair that isolates cleanly, a pair that places comfortably, and enough practice to know what you actually prefer. Start with two good pairs, learn on them, and let your own hands tell you what to change. For what to focus on after you have your tools, see classic vs volume lash extensions: which first or how to know you’re ready for volume lashes.
Free Guide
Get Your Free Lash Extensions Starter Guide
A $17 value, yours free today. We'll send the guide straight to your inbox in the next minute.
You'll also get occasional lash tips by email. Unsubscribe anytime.
Frequently Asked Questions
Two is enough to start: one for isolating natural lashes and one for picking up and placing extensions. Once you know your own preferences, you can add a volume or specialty pair, but there is no need to buy a large set before you have tried the basics.
Keep Reading
Popular Lash Training Guides
- Minimum Age For Eyelash Extension Training
- Eyelash Extension Training Cost In 2026: Real Breakdown
- Lash Tech License Requirements By State
- Is It Hard To Learn Eyelash Extensions? Honest Answer
Ready to go from reading to doing? See the full Lash Extensions Master Course or browse all lash training guides.