Lash Curls, Lengths And Thickness Explained
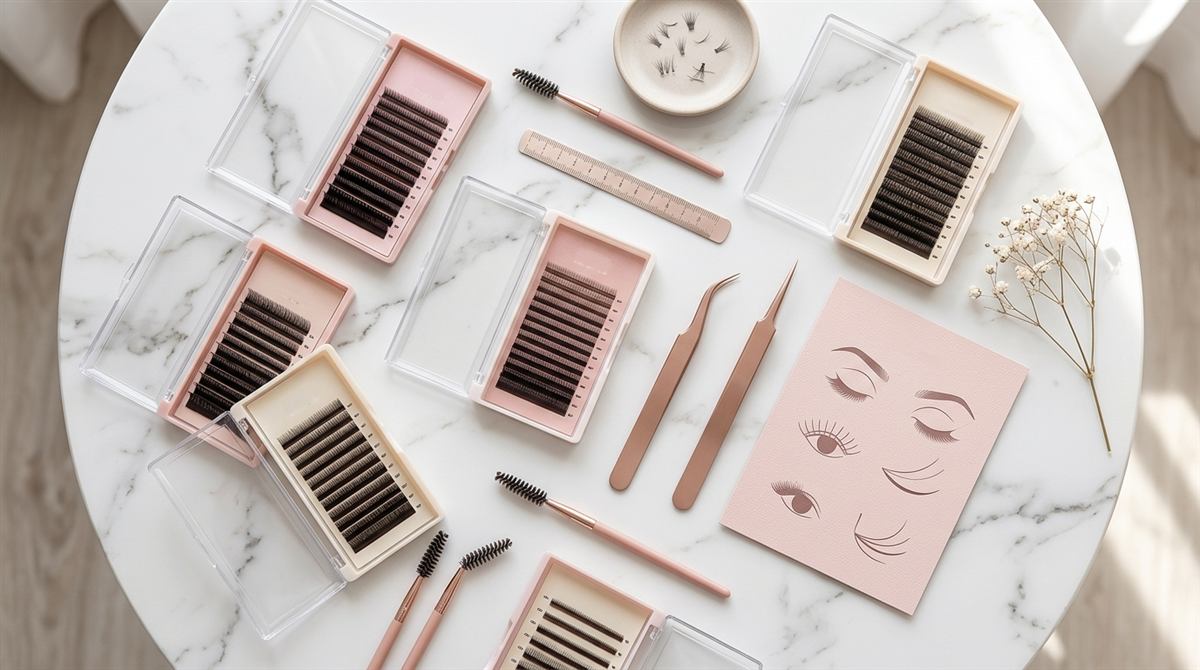
You open a supplier’s website to look at lash extensions and suddenly you are staring at a wall of letters and numbers: J, B, C, D, 0.07, 0.15, 9 mm, 12 mm, 14 mm. It looks like a language you were supposed to learn in school. If you have ever closed the tab and thought “I will never understand this,” you are in very good company, because every lash artist started at exactly the same confusing place.
Free Guide
Get Your Free Lash Extensions Starter Guide
A $17 value, yours free today. We'll send the guide straight to your inbox in the next minute.
You'll also get occasional lash tips by email. Unsubscribe anytime.
Every lash extension has three settings: curl, length and thickness. Once you understand what each one does to the look and to the natural lash underneath, the charts stop being scary and start being a toolbox.
This guide breaks down all three in plain language, shows how they work together, and explains how a lash course teaches you to choose them with confidence instead of guessing.
The Three Settings Behind Every Lash Extension
Think of a lash extension like a small piece of design that you can adjust three ways:
- Curl decides the shape and how much lift and openness the lash gives the eye.
- Length decides how long the lash is, measured in millimeters.
- Thickness, also called diameter, decides how heavy and how dark or fluffy the lash appears.
Change any one of the three and the entire set looks different. Change two of them carelessly and you can end up with a set that looks wrong or that puts too much weight on the client’s natural lashes. That is why lash extension classes spend real time on this topic.
Lash Curls Explained: J, B, C And D
The letters describe how much a lash bends from base to tip. Suppliers use slightly different labels, but the common ones follow the same idea.
- J curl is the gentlest curve. It mimics a natural, barely curled lash, and works well for a soft, understated look or for clients with naturally curly lashes.
- B curl has a little more lift than J, and gives a natural but slightly more defined look.
- C curl is the workhorse. It opens the eye and gives a lifted, polished look without appearing over the top, which is why it is one of the most commonly used curls.
- D curl curves the most, creating a dramatic, doll-like lift. It looks striking, but it is not right for every eye shape.
Some suppliers also offer flatter or lifted curls designed for particular needs, such as very straight natural lashes or lashes that point downward. The names vary, but the principle is the same: the more a curl bends, the more dramatic the lift.
How Length Works
Length is measured in millimeters, and lash extensions commonly range from short lengths of around 6 to 8 mm up to 15 mm and beyond. Longer does not automatically mean better. A set with every lash the same length looks flat and unnatural, while a set with different lengths placed in the right areas creates the shape and character of the style.
Two rules of thumb guide most decisions. First, extensions should be chosen relative to the client’s own natural lash length, staying within a safe range rather than jumping far above it. Second, the lengths you place at the inner corner, center and outer corner of the eye create the overall shape, which is exactly what lash mapping controls. If you want to see how that works, read lash mapping: styling for every eye shape.
How Thickness Works
Diameter is also measured in millimeters, but in tiny numbers. Classic extensions, which are applied one extension to one natural lash, tend to be thicker, commonly around 0.15 mm to 0.20 mm. Volume extensions, which are fine lashes bonded together into a fan, are much finer, often 0.03 mm to 0.10 mm, so that a whole fan stays light.
Thickness affects three things:
- Weight. Thicker extensions are heavier, and a natural lash can only carry so much.
- Darkness and density. A thicker or fuller lash looks darker and bolder.
- Comfort and retention. An extension that is too heavy for the natural lash can pull and fall off early.
Why Matching The Extension To The Natural Lash Matters So Much
The natural lash is the foundation of the whole set. A fine, fragile natural lash can carry only a light extension, while a strong, thick natural lash can support a heavier one. Choosing an extension that is too thick, too long or too curled for the natural lash can lead to discomfort, breakage and shortened retention.
This is one of the biggest differences between someone who watched a few videos and someone who went through structured training. A trained artist learns to look at the natural lash first, judge its strength, and then choose curl, length and thickness to match. If you are thinking about how weight and technique connect to the difference between classic and volume sets, see classic vs volume lashes: which first?.
How Curl, Length And Thickness Work Together
Here are a few examples of how the three settings combine, purely as illustrations:
- A client who wants a soft everyday look with fine natural lashes might get a lighter classic set with gentle curls and conservative lengths.
- A client who wants a fuller, glamorous look with strong natural lashes might get volume fans with a stronger curl and more varied lengths.
- A client with hooded eyes may need a different curl and length pattern than one with wide-set round eyes, which is where mapping and curl choice work together.
None of these are rules to memorize. They are examples of the thinking process a good course teaches: assess the natural lash, assess the eye shape, listen to the look the client wants, then choose the settings.
Reading A Supplier Chart Without Getting Lost
Supplier catalogs list curls, lengths and thicknesses in tables, and at first they look like a wall of numbers. Read them in this order: pick the curl, then find the diameter that suits the type of set you are building, then look at the lengths available for that combination. Many trays combine several lengths in one strip, so the chart also tells you how those lengths are arranged.
Keep a small notebook or a note on your phone with the combinations you use most, along with which clients they worked for. Over a few weeks, you will notice patterns, and that personal reference becomes more useful than any chart. It also helps you reorder supplies efficiently, which connects to monthly supply costs after a lash course.
Practicing Your Choices Before Touching A Client
You can build your eye for curl, length and thickness long before you work on a live client. Lay out a few lashes in different curls on a table and look at how they sit side by side. Practice on a mannequin head with intentionally different combinations, and compare the results in photos. Ask yourself which set looks most natural, which looks most dramatic, and why. This kind of comparison trains your judgment faster than reading about it, and it is one reason mannequin practice matters so much, as described in how to practice lash extensions between lessons.
Common Beginner Mistakes With Curls, Lengths And Thickness
- Going too long, too soon. Beginners often reach for long lashes because they look impressive, and overload the natural lash.
- Choosing curl based only on preference. The client’s natural lash direction and eye shape matter.
- Using one length everywhere. Without variation, the set looks flat.
- Ignoring natural lash strength. A heavy extension on a weak lash causes problems.
- Mixing up supplier labels. Curl and thickness charts differ slightly between brands, so learn to check each supplier’s chart.
Quick Checklist: Choosing Curl, Length And Thickness
- Look at the client’s natural lash first: length, strength and direction.
- Choose a curl that suits both the look you want and the natural lash direction.
- Keep extensions within a safe range of the natural lash length.
- Match thickness to the natural lash’s strength.
- Vary lengths across the eye to build the shape you mapped.
- Always check your supplier’s own curl and thickness chart.
What Our Course Includes
The Lash Extensions Master Course starts with product knowledge, lash basics and styling before it ever asks you to apply a lash, so curls, lengths and thicknesses make sense by the time you are working on a mannequin head. It then takes you through classic mannequin work, a volume full set, hybrid refills, aftercare and removals across 31 video lessons, with lifetime access, a Certificate of Completion and a 90+ page training manual.
Final Thoughts
You do not need to memorize a supplier’s whole catalog to start. You need to understand what each of the three settings does, so that every choice you make has a reason behind it. That is a skill you build with good instruction and steady practice. If you are comparing training options, read what an eyelash extension training course actually includes next, or how to know you are ready for volume lashes.
Free Guide
Get Your Free Lash Extensions Starter Guide
A $17 value, yours free today. We'll send the guide straight to your inbox in the next minute.
You'll also get occasional lash tips by email. Unsubscribe anytime.
Frequently Asked Questions
The most common curls are J, B, C and D, from the most natural and subtle to the most dramatic. C curl is the most widely used because it opens the eye without looking too dramatic.
Keep Reading
Popular Lash Training Guides
- Minimum Age For Eyelash Extension Training
- Eyelash Extension Training Cost In 2026: Real Breakdown
- Lash Tech License Requirements By State
- Is It Hard To Learn Eyelash Extensions? Honest Answer
Ready to go from reading to doing? See the full Lash Extensions Master Course or browse all lash training guides.