Portfolio Photo Lighting After Lash Course
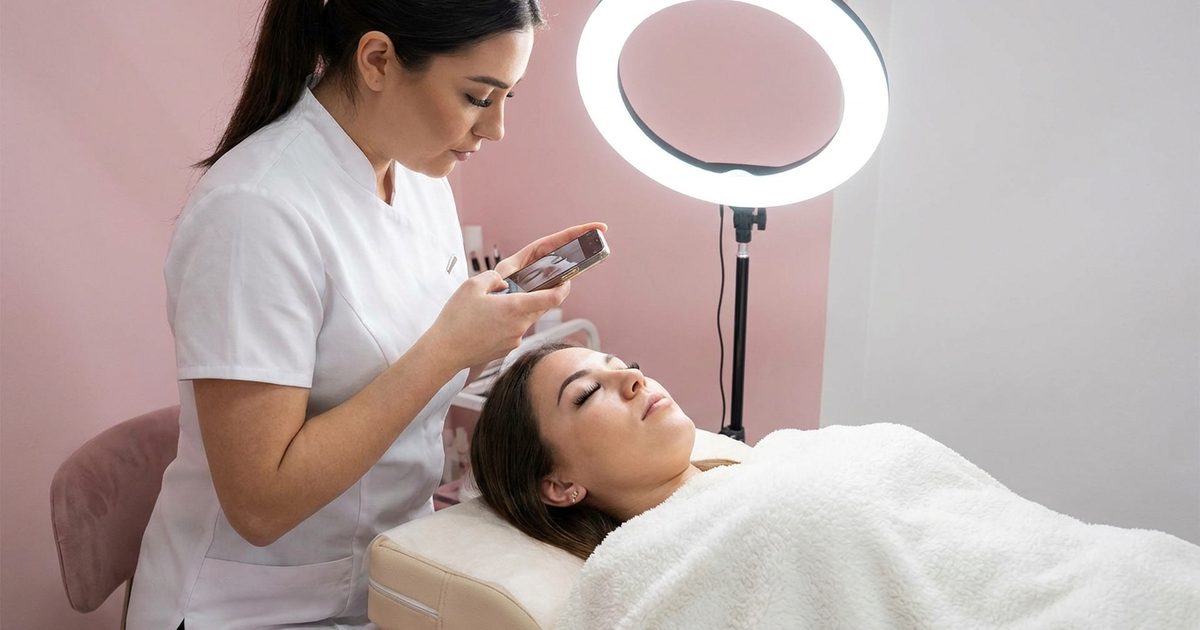
You can finish your lash course with genuinely excellent technique and still struggle to book clients if your portfolio photos do not show that work clearly. Lighting is the single biggest reason a great set looks unremarkable in a photo, and it is one of the simplest things to fix once you know what to look for.
Free Guide
Get Your Free Lash Extensions Starter Guide
A $17 value, yours free today. We'll send the guide straight to your inbox in the next minute.
You'll also get occasional lash tips by email. Unsubscribe anytime.
A well-applied set photographed under harsh overhead light will look worse in a photo than a mediocre set photographed under soft, even light. Lighting is doing more work than most new lash artists assume.
Why Overhead Lighting Flattens Good Lash Work
Standard ceiling lighting comes from above and slightly behind where a client’s face is positioned during a lash appointment, which casts shadows under the brow bone and directly across the lash line, exactly the detail a portfolio photo needs to show clearly. Even technically excellent volume fans can look muddy or uneven in a photo lit this way.
What Actually Reads Clearly In A Photo
A soft, even, front-facing light source positioned near the client’s eye level eliminates those shadows and lets fan shape, curl direction and density show clearly. A basic ring light works well for this, and a large window with diffused daylight, meaning bright but not direct sun, achieves a similar effect for free.
You Do Not Need An Expensive Camera For This
A recent smartphone camera is genuinely sufficient for the vast majority of lash portfolio photography. Lighting has a far bigger effect on how clearly the work reads than camera quality does, which means this is one of the more affordable parts of building a strong portfolio.
Keeping Before And After Photos Honest And Consistent
One of the most common portfolio mistakes is photographing the “before” shot under dim or unflattering light and the “after” shot under bright, flattering light. Even when the actual lash work is entirely honest, an inconsistent lighting comparison looks staged to a potential client browsing your portfolio, which quietly undermines trust before they ever book.
Simple Setup For A Home Studio Or Salon Suite
Position your client facing a large window or a ring light directly, not lit from the side or above. Take the after photo from the same angle and distance as the before photo whenever possible, so the only real difference between the two images is the lash work itself, not the framing or light.
Quality Over Quantity When Building The Portfolio
A tight set of eight to twelve genuinely well-lit photos, showing a range of styles and different client eye shapes, does more to book new clients than a larger, inconsistent collection. Prioritize consistent lighting and honest comparisons over simply accumulating more photos quickly.
Why Editing Apps Cannot Fully Fix Bad Lighting
Once harsh overhead lighting has already cast a shadow across the lash line, no amount of brightness or contrast adjustment in a phone editing app fully recovers that lost detail. Editing can smooth minor inconsistencies, but it cannot manufacture the clarity that correct lighting captures at the moment the photo is taken. Treat lighting as something to get right during the shoot itself, not something to fix afterward, and you will spend far less time editing every single portfolio photo.
Preparing The Client For The Photo, Not Just The Camera
The lighting setup matters most, but a few small client-facing details help too. Ask the client to keep their eyes gently closed or looking slightly downward without squinting, and to keep eye makeup minimal for the after photo specifically, so the lash extensions themselves remain the clear visual focus rather than competing with heavy eyeshadow or smudged mascara. These small adjustments take seconds to ask for and noticeably improve how clearly the final result reads.
A Simple Lighting Checklist Before You Photograph A Client
- Turn off or minimize reliance on overhead room lighting for portfolio shots.
- Use a ring light or diffused window daylight positioned at the client’s eye level.
- Photograph the before and after shots from the same angle, distance and lighting.
- Prioritize a smaller set of consistently well-lit photos over a large inconsistent one.
- Vary the eye shapes and styles shown, not just the number of photos.
A Simple Budget Setup That Covers Most New Lash Artists
You do not need to buy a professional lighting kit to get this right. A single clip-on ring light in the ten to twelve inch range, the kind commonly used for video calls and content creation, is enough to light a client’s face evenly for portfolio photography, and it is inexpensive enough to buy in your first week of practicing on models. Pair it with a plain, uncluttered background, even a blank wall, so nothing in the frame distracts from the lash work itself.
Reviewing Your Existing Photos With Fresh Eyes
If you already have a portfolio started, it is worth going back through your existing photos specifically looking for inconsistent lighting between shots, rather than assuming the issue only affects new photos going forward. Retaking even a handful of your strongest sets under better lighting, if the clients are willing to come back briefly, can noticeably improve how professional your whole portfolio reads without needing to build an entirely new one from scratch.
Common Photo Mistakes Worth Skipping
- Shooting with the phone flash on, which bounces off wet adhesive and glossy lashes and hides the fan detail.
- Taking the photo with the client’s eyes half open, so you cannot judge isolation or length at all.
- Changing the angle between the before and after shots, which makes honest comparison impossible.
- Posting the first shot you take instead of the sharpest one out of a quick burst of five or six.
What Our Course Gives You Instead
The Lash Extensions Master Course includes portfolio-building guidance alongside its 31 sequential technique lessons, so you are not left guessing how to actually present the skill you just spent real time and money developing, with lifetime access to revisit as your portfolio grows.
Final Thoughts
Your technique is what earns a client’s trust once they are in your chair, but your portfolio photos are what get them there in the first place. A simple, consistent lighting setup costs very little and does more for how your work reads online than almost any other single change a new lash artist can make.
If you are still building your first set of client photos, read Before And After Photos: Building A Portfolio During A Lash Course next, or check Build A Portfolio During A Lashing Course for how to gather these photos while you are still training.
Free Guide
Get Your Free Lash Extensions Starter Guide
A $17 value, yours free today. We'll send the guide straight to your inbox in the next minute.
You'll also get occasional lash tips by email. Unsubscribe anytime.
Frequently Asked Questions
No. A recent smartphone camera is enough for the vast majority of lash portfolio photography. The lighting setup matters far more than the camera itself, since poor lighting flattens even genuinely excellent extension work.
Keep Reading
Popular Lash Training Guides
- Minimum Age For Eyelash Extension Training
- Eyelash Extension Training Cost In 2026: Real Breakdown
- Lash Tech License Requirements By State
- Is It Hard To Learn Eyelash Extensions? Honest Answer
Ready to go from reading to doing? See the full Lash Extensions Master Course or browse all lash training guides.