Take Before-After Photos That Sell You
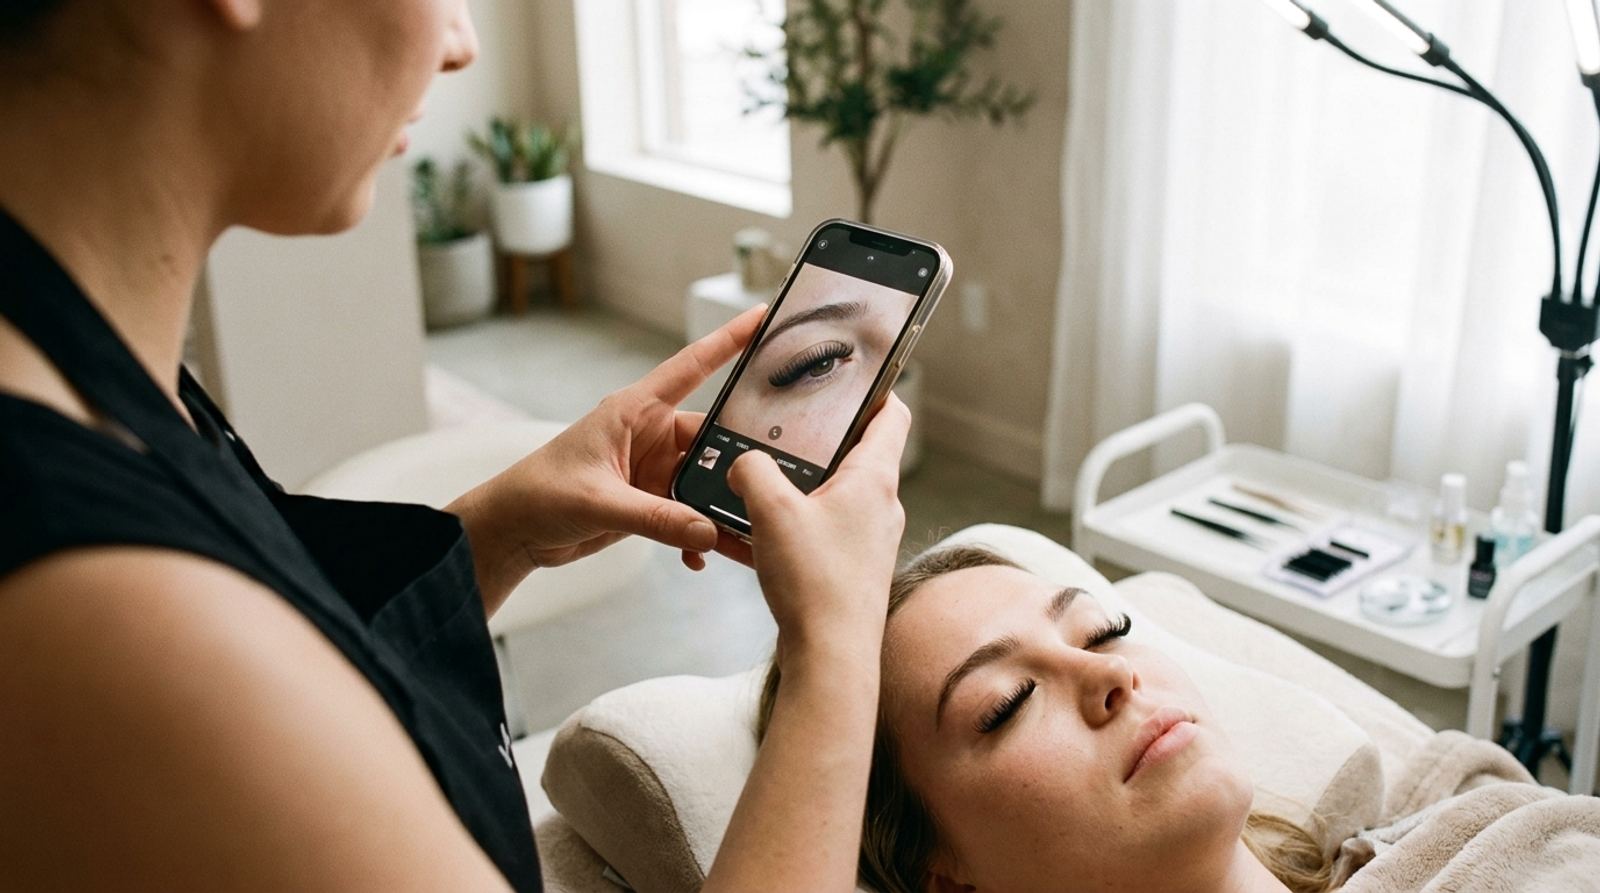
A stunning set of lash extensions that gets photographed badly might as well not exist for anyone scrolling past it online, and a genuinely good but average set that’s photographed well often books more clients than the reverse. Your actual technique matters most, obviously, but the photo is what a stranger sees before they ever sit in your chair, and learning to take one that does your work justice is a skill worth taking as seriously as your application technique.
Free Guide
Get Your Free Lash Extensions Starter Guide
A $17 value, yours free today. We'll send the guide straight to your inbox in the next minute.
You'll also get occasional lash tips by email. Unsubscribe anytime.
Why The Photo Matters Almost As Much As The Set Itself
Nobody booking a lash appointment for the first time has felt your isolation technique or watched your consultation. All they have to go on is what they see in your photos, so a photo that undersells genuinely good work costs you bookings just as surely as sloppy application would. This isn’t vanity, it’s the reality of how most new clients discover and evaluate a lash artist before ever making contact, which is exactly why photography deserves real attention in your training, not an afterthought once you already know how to lash.
Lighting Is The Single Biggest Factor
Soft, even, natural light near a window beats a ring light or overhead lighting almost every time. Harsh direct light creates shadows under the lash line that hide exactly the detail you want to show off.
Position your client facing a window with soft daylight, not direct sun, and avoid overhead lighting that casts shadows downward across the eye area. If natural light isn’t available, a soft, diffused light source at roughly eye level works as a substitute, but avoid anything harsh or angled sharply from above. The goal is even light across the whole eye area with no strong shadows competing with the lash line for the viewer’s attention.
Keep The Before And After Shot As Consistent As Possible
Shoot the before and after photo from the exact same angle, distance, and lighting setup, ideally without moving your camera position between the two at all. If the lighting or angle shifts between shots, viewers subconsciously credit part of the visible difference to the photo conditions rather than to your actual work, which undercuts the impact of a genuinely strong transformation. A consistent setup makes the improvement in the after photo read as entirely your work, which is exactly the impression you want a potential client to walk away with.
Angle And Framing That Actually Shows The Work
A straight-on angle, camera roughly level with the client’s eyes, shows the lash line and mapping clearly. Extreme close-ups can look impressive but sometimes lose the context of how the set looks on the whole eye, while photos taken too far back lose the fine detail that makes lash work worth photographing in the first place. A medium-close framing that captures the whole eye area, brow to cheekbone, tends to give viewers the clearest sense of both the detail and the overall effect together.
Getting The Eye Position Right Across Both Shots
Ask your client to look straight ahead and keep their eyes gently open in a relaxed, natural position for both the before and after photo, rather than squinting, looking down, or angling their face differently between shots. Small differences in eye position or gaze direction between the two photos can make an honest improvement look exaggerated or, just as often, make a genuinely dramatic transformation look smaller than it actually was. A quick, calm instruction, “just relax your face and look straight at me like you did a minute ago,” takes a few seconds and meaningfully improves how comparable the two photos actually are.
Get Genuine Consent Before You Photograph Or Post
Ask before you take the photo, explain that it’s for your portfolio, and ask again specifically before you post it publicly, since a client being fine with an in-chair photo doesn’t automatically mean they’re comfortable with it going on your public social media. Most clients say yes without hesitation when you ask directly and respectfully, but skipping this step, even with good intentions, is a trust issue that’s completely avoidable with one extra question.
Building A Consistent Portfolio Style Over Time
Beyond individual photos, aim for a consistent visual style across your whole portfolio: similar lighting, similar angle, similar background where possible. A portfolio where every photo looks like it was taken in a different setting with different lighting reads as inconsistent and unpolished, even if every individual set of extensions was excellent. Consistency across your photos signals the same professionalism that consistency in your actual technique does, and it’s one of the fastest ways to make a still-growing portfolio look more established than it might actually be yet.
Background And Setting Matter More Than People Expect
A cluttered background, a messy countertop, visible trash, or harsh clinical fluorescent tile behind your client pulls attention away from the lashes themselves and can make even excellent work look less polished than it is. You don’t need an elaborate backdrop, a clean, simple wall or a neutral fabric backdrop behind the client’s head is enough to keep the focus entirely on the eye area. Taking two minutes before you start shooting to tidy the visible background, or repositioning your client slightly, is a small step that noticeably raises the perceived professionalism of every photo you take that day.
Consider Short Video Alongside Still Photos
A short video clip, the client blinking naturally, or a slow pan across the finished set, adds a dimension a still photo can’t: movement, which is often what makes a set look truly natural rather than staged. This doesn’t need to replace your photo routine, it’s a quick addition using the same setup you’ve already got in place. Video content also tends to perform differently on social platforms than static photos, so having both gives you more flexibility in how you show the same appointment’s results across different posts.
What To Do With The Photos Once You Have Them
A strong before-and-after photo is worth more than one use. Post it to your social profiles, but also save it for your website or booking page, and keep a running folder organized by technique (classic, hybrid, volume) so you can quickly pull the right example when a prospective client asks to see work similar to what they’re picturing for themselves. Treating your photo library as a growing, organized asset rather than scattered posts you’d have to search for later saves real time once you’re actively booking clients.
What Our Course Includes
The Lash Extensions Master Course covers the business side of building a client base, including portfolio building, alongside the full technical curriculum, for a one-time $97 payment with lifetime access, so you finish ready to show your work, not just to do it well in private.
Final Thoughts
A great set of extensions deserves a photo that actually shows it off, and that photo is often the first impression a future client forms of your work before they ever meet you. Prioritize consistent, soft lighting, always get genuine consent, and keep your photo style consistent across your whole portfolio. For where to start putting those photos to work, read building your portfolio during your lash course, or see finding clients through local partnerships for another way to turn strong photos into real bookings.
Free Guide
Get Your Free Lash Extensions Starter Guide
A $17 value, yours free today. We'll send the guide straight to your inbox in the next minute.
You'll also get occasional lash tips by email. Unsubscribe anytime.
Frequently Asked Questions
No. A recent smartphone with good lighting produces results that look completely professional for lash photography. The lighting setup and angle matter far more than the camera itself.
Keep Reading
Popular Lash Training Guides
- Minimum Age For Eyelash Extension Training
- Eyelash Extension Training Cost In 2026: Real Breakdown
- Lash Tech License Requirements By State
- Is It Hard To Learn Eyelash Extensions? Honest Answer
Ready to go from reading to doing? See the full Lash Extensions Master Course or browse all lash training guides.